Step 1: Run the AppeonCloud application (browse the application in the right Actions pane in the IIS manager). The Appeon Cluster Manager displays.
Step 2: Input the username and password (both "admin") to log into the Appeon Cluster Manager.
Step 3: Click Cluster Settings. Different configuration settings will be displayed according to the Local, Amazon Web Services and Windows Azure platform.
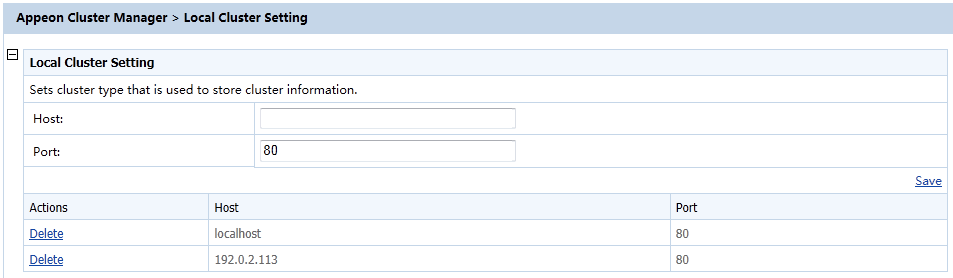
For Local (non-cloud platform):
-
Specify the host name (or IP address) and port number of the server instance.
-
Click Save. The server instance will be added to the cluster.
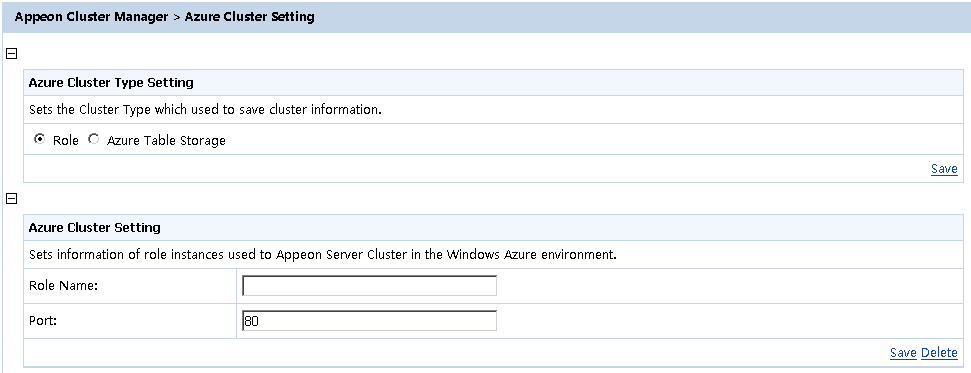
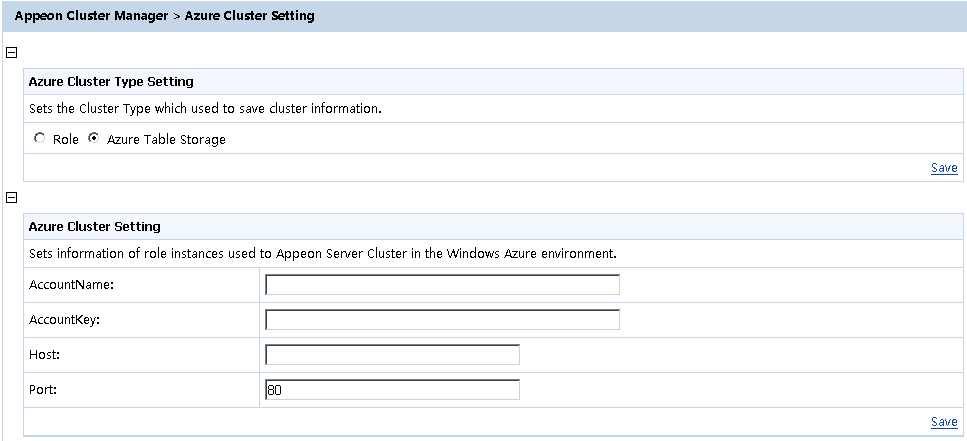
For Windows Azure cloud platform:
-
Select the Azure cluster type. The cluster type determines the way to get and save the Appeon Server information on Windows Azure. There are currently two ways supported:
-
Role: Gets the Appeon Server information according to the role name of the instance where Appeon Server is installed; it requires that Appeon Cluster and Appeon Server are on the same host service.
-
Azure Table Storage: Has no such limit as Role.
-
-
Create the Appeon Server cluster by adding the server instance one by one.
For the Role type, specify the Role Name and Port of the server instance.
-
Role Name: Role name of the instance where Appeon Server is installed.
-
Port: Port used by Appeon Server.
For the Azure Table Storage type, specify the Account Name, Account Key, Host, and Port of the server instance.
-
AccountName: Account name of Windows Azure Table storage mode.
-
AccountKey: Account key of Windows Azure Table storage mode.
-
Host: DIP of the instance where Appeon Server is installed.
-
Port: Port used by Appeon Server.
Click Save. The server instance will be added to the cluster.
-
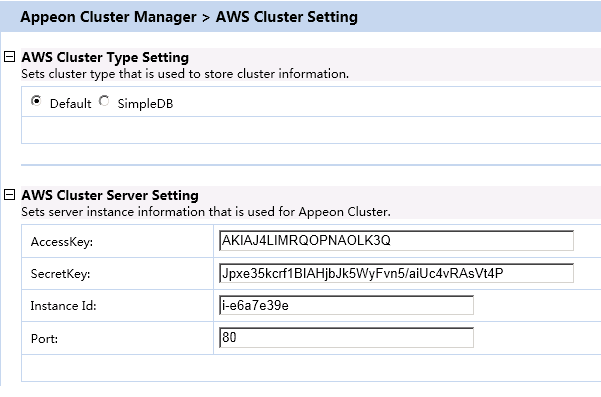
For Amazon Web Services cloud platform:
-
Select the AWS cluster type. The cluster type determines the way to the Appeon Server list and the cluster information. There are two ways supported:
-
Default: indicates that the information is stored in the default local XML file.
-
SimpleDB: indicates that the information is stored in the Amazon SimpleDB service.
-
-
Create the Appeon Server cluster by adding the server instance one by one.
-
AccessKey & SecretKey: The system will automatically create an access key for you when creating the AWS account and you can log into AWS and enter the Security Credentials page to obtain the Access Key ID and Secret Access Key.
-
Instance ID: ID of the instance where Appeon Server is installed.
-
Port: port number of Appeon Server, and the default number is 80.
Click Save. The server instance will be added to the cluster.
-
Step 4: Configure the other settings of the cluster, such as load balancing algorithm, timeout, and interval.
Table 1. More cluster settings
|
Settings |
Description |
|---|---|
|
Load Balancing |
Specify the load balancing algorithm which determined how requests will be distributed among the servers in the cluster. Random indicates that the plug-in distributes requests across Appeon Servers in random order, regardless of the status of Appeon Server; Sequence indicates that the plug-in distributes requests to Appeon Server in an allocated order. |
|
Timeout |
Specify the timeout for distributing a request, and the default value is 30 seconds. |
|
Interval |
Specify the interval (in seconds) for the plug-in to refresh the Appeon Server list. |

Step 5: Restart IIS to make the new settings effective.
