To install PowerServer Mobile/Web on the Unix\Linux platform, you will go through the same installation process as that used for the Windows platform. The only difference is, with the Unix\Linux platform, you will complete the installation process in command line mode, instead of using graphical user interfaces.
Step 1: Verify that WebLogic server, as well as any other programs you may be running, is stopped.
Step 2: Open the Appeon4WebLogic folder from the Appeon setup program and run the install.sh file using the command below:
./install.sh
Notes:
-
If you copy the Appeon setup program to the computer before installation, make sure that the directory does not contain special characters or spaces.
-
When you input the command, please be aware that file names and directory names are case sensitive.
The welcome message is displayed, which indicates that the installation process has started. Follow the step-by-step prompts to install PowerServer.
Step 3: Press Enter or input Next to proceed.
 Step 1. Welcome Message
 -------------------------

 #################################################################

 Welcome to PowerServer 2017 for WebLogic Server installation!

 #################################################################

 Press Enter to start the installation [Exit][Next]>
You can also input n, N, next or Next to indicate Next, p, P, previous, or Previous to indicate Previous, and e, E, exit or Exit to indicate Exit. Notice that the input is case sensitive.
Step 4: Specify a JDK 1.6 or above to be used during the setup progress. The setup program will check whether the JAVA_HOME variable exists and whether it points to a valid JDK 1.6 or above. If it is valid, the JDK path will be automatically displayed as below; if it is not valid, please set a valid JDK 1.6 or above location.
 Step 2. Set JDK 1.6 or above path
 -----------------------


 JDK path is "/home/jdk1.6.0_17"
 Press Enter to continue [Exit][Next]>
Step 5: According to the license you purchase, select the Product Type.
 Step 3. Please choose Product Type

 #################################################################

 1. PowerServer Web
 2. PowerServer Mobile
 3. PowerServer Web and PowerServer Mobile
 4. PowerServer Web & Mobile


 Please select a number to continue OR [Exit][Previous][Next]>
Step 6: Enter the Product Key that is shipped with the product.
 Step 4. Product Key for PowerServer Web & Mobile
 -------------------------

 #################################################################

 The format of the product key provided by Appeon should be XXXX-XXXX
 -XXXX-XXXX-XXXX-XXXX-XXXX. All characters should be capitalized.

 #################################################################

 Please input the product key or [Exit][Previous]>
Step 7: Specify the home directory of the WebLogic server as the PowerServer Mobile/Web installation directory, for example, /root/bea/weblogic92/.
 Step 5. Install Directory
 -------------------------

 Please input the WebLogic home directory you want to install PowerServer 2017
(e.g. ../weblogic11g/wlserver) or [Exit][Previous]>

 The PowerServer 2017 will be installed in /home/bea/weblogic92/
Step 8: Specify the WebLogic domain path where the PowerServer EAR package (appeonserver.ear) will be deployed.
Step 6. Specify WebLogic Domain
 -------------------------

 Please input the WebLogic domain directory you want to deploy PowerServer 2017
(e.g. ../bea/user_projects/domains/base_domain/) or [Exit][Previous]>
Step 9: Confirm the setup settings.
Step 7. Confirm the Information
 -------------------------

 #################################################################

                Confirm the installation

  The product type is "PowerServer Web & Mobile"
  The product key for PowerServer Web & Mobile is "XXXX-XXXX-XXXX-XXXX-XXXX-XXXX-XXXX"
  The installation directory is "/home/AppServer/weblogic11g/wlserver"
  The specified WebLogic domain home is "/home/AppServer/weblogic11g/user_projects/domains/base_domain"
  AEM Console:
              Username: admin
              Password: admin

  The installer will start installing the files on your system.
  Go back if you want to change any settings for the installation.


 #################################################################

 Please select an option to continue[Exit][Previous][Next]>
Press Enter to begin copying the required files or input p or Previous to modify the setup settings.
Step 10: When the installation is complete, choose whether to start PowerServer.
#################################################################

 Congratulations! The installation has been successfully completed.

 #################################################################

 Start PowerServer
 ------------------------------

 Do you want to start the PowerServer now? [Yes|No]>
To start PowerServer immediately input y. To start it later input n. Refer to Starting/Stopping PowerServer for how to manually start PowerServer using commands.
If the WebLogic Server runs in the Production mode (rather than the Development Mode), you would need to manually deploy the PowerServer EAR package (appeonserver.ear) in the WebLogic Server Administration Console after the PowerServer Mobile/Web installation.
Skip this section if WebLogic Server runs in the Development mode because WebLogic Server in Development mode includes an auto-deployment feature which can detect the PowerServer EAR package (appeonserver.ear) and automatically deploy it. In this case, you can verify that PowerServer was successfully installed and deployed by starting WebLogic Server and then accessing AEM via http://localhost:7001/AEM on the local machine.
Follow the instructions below to deploy the appeonserver.ear package if WebLogic Server runs in the Production mode.
Step 1: Start WebLogic Server. Open the $BEA_HOME/user_projects/domains/mydomain/bin/ folder and run the startWebLogic.sh file. For details on starting WebLogic Server, refer to Starting/Stopping PowerServer.
Step 2: Access WebLogic Server Administration Console via http://localhost:7001/console on the local machine. The WebLogic Login window will appear.
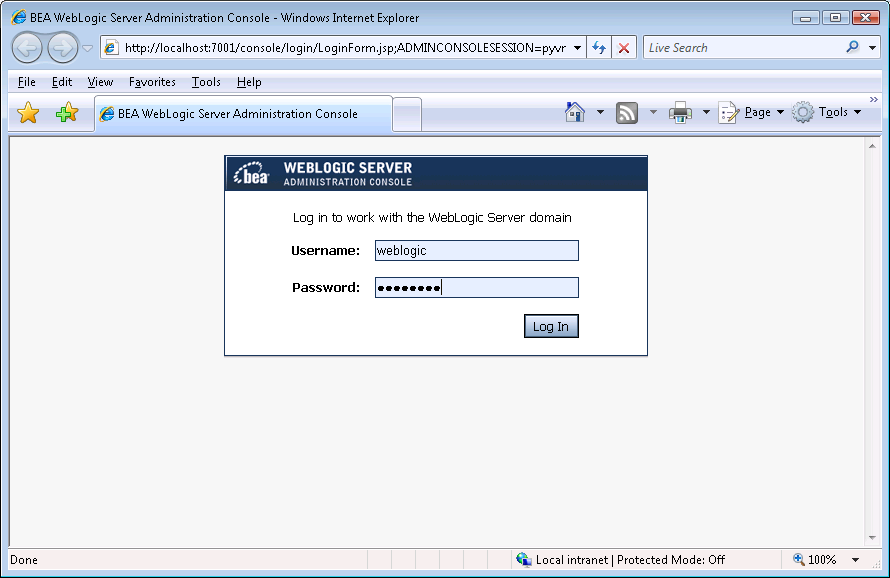
Step 3: Log in to the WebLogic console with the correct username and password.
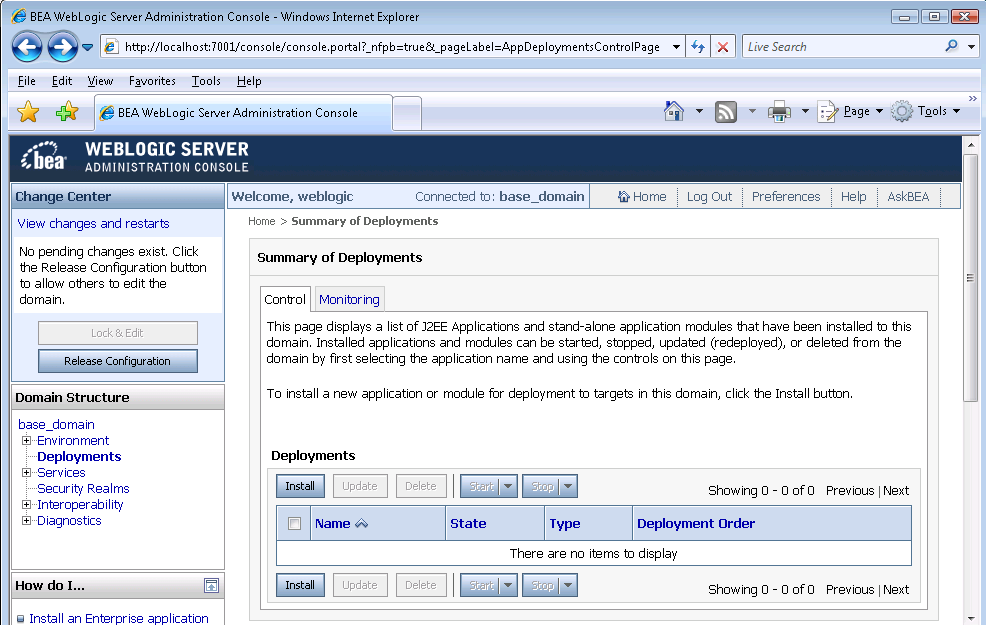
Step 4: Click the Deployments node and click Lock & Edit in the left pane, and then click Install in the right pane.
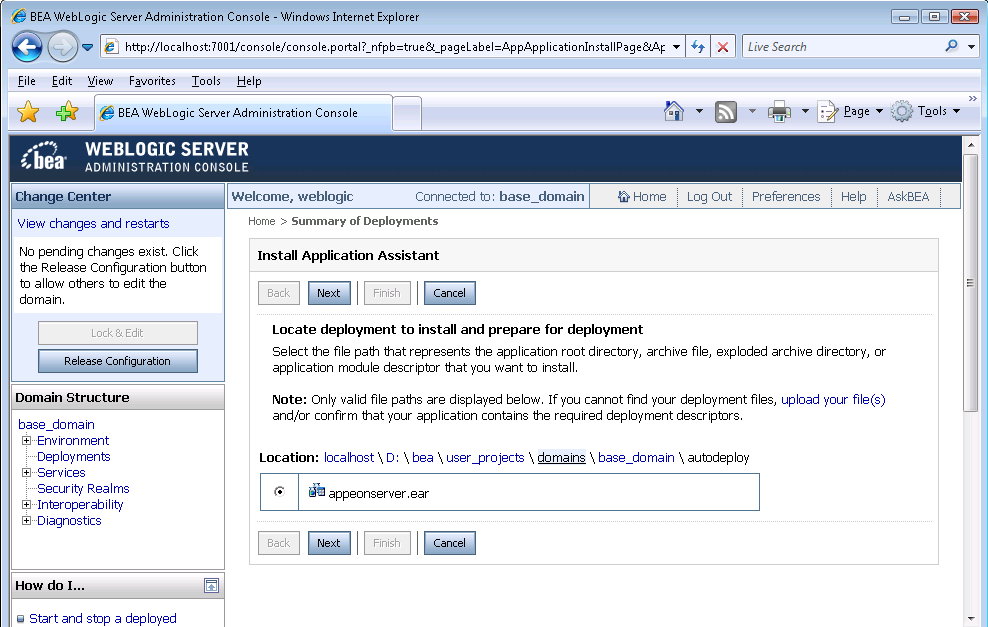
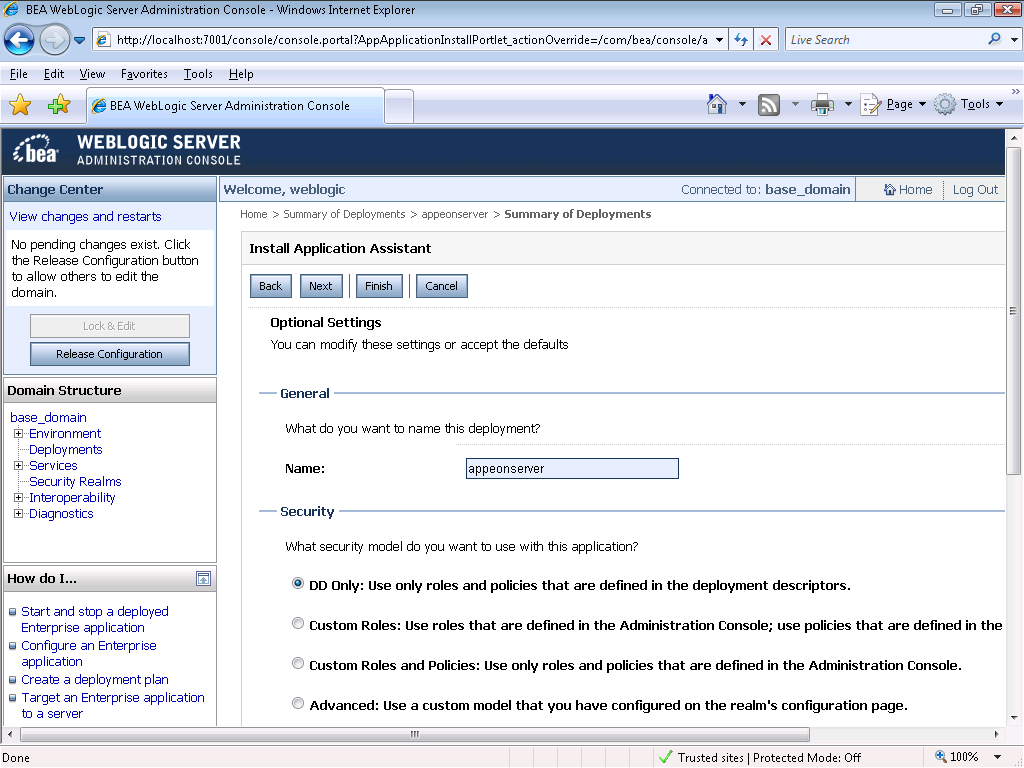
Step 5: Specify an application folder you want to install the appeonserver.ear using Install Application Assistant in the Install Application Assistant page, and then click Next.
The applications folder is where the PowerServer EAR package (appeonserver.ear) should be placed when it is installed to the WebLogic Server domain.
-
If you are using WebLogic 8, the appeonserver.ear resides in $BEA_HOME/user_projects/domains/mydomain/applications.
-
If you are using WebLogic 9/10, the appeonserver.ear resides in $BEA_HOME/user_projects/domains/mydomain/autodeploy.
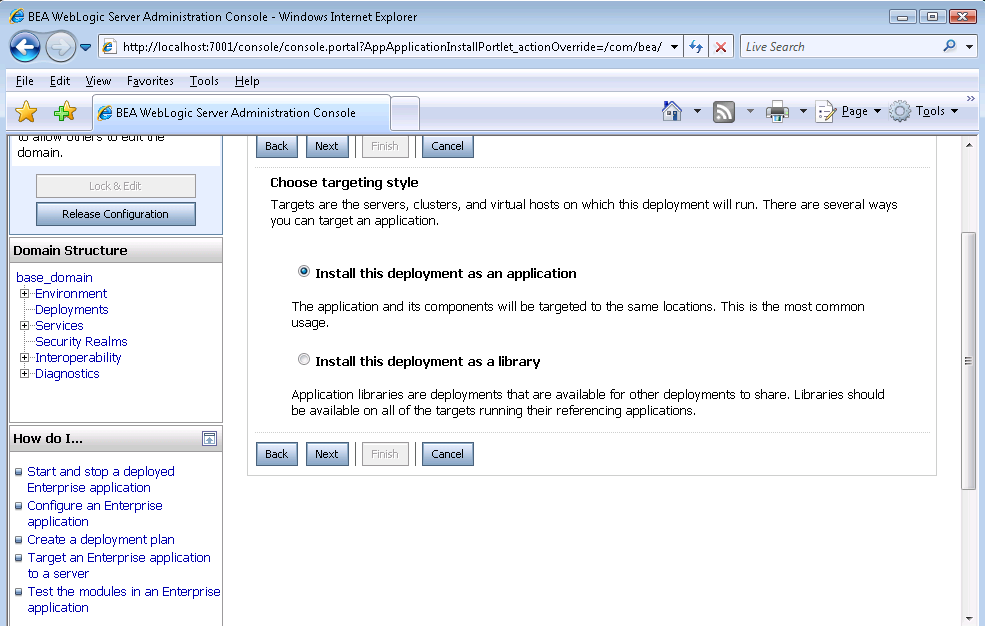
Step 6: Select Install this deployment as an application. Click Next.
Step 7: Use the default settings, and then click Next.
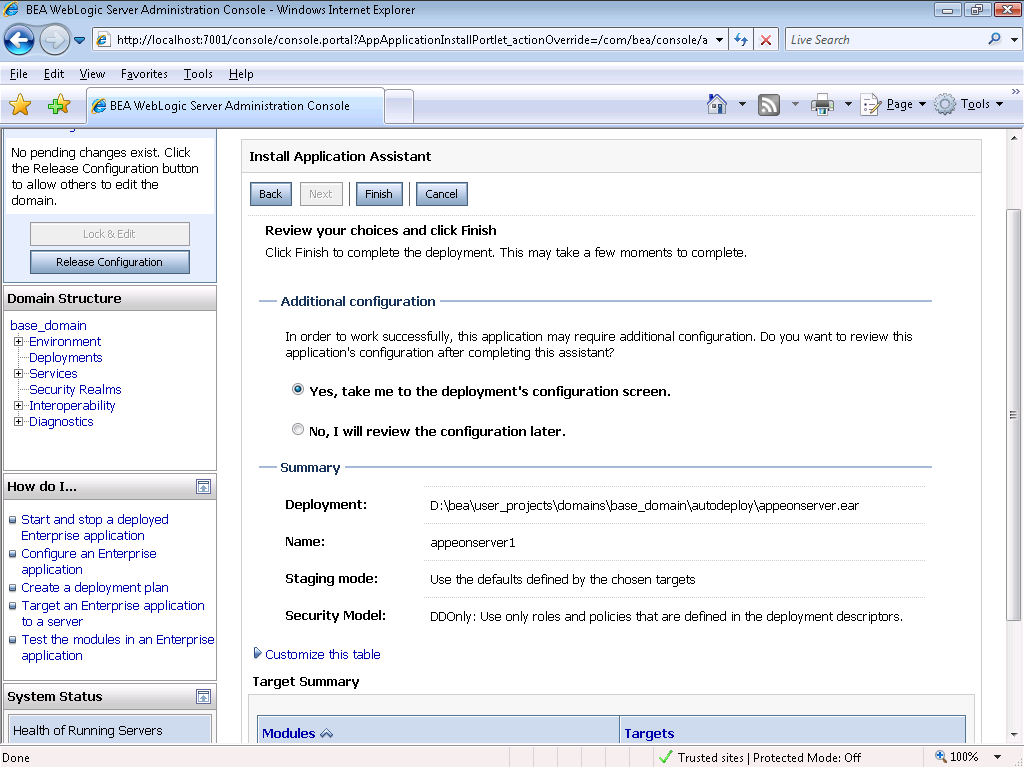
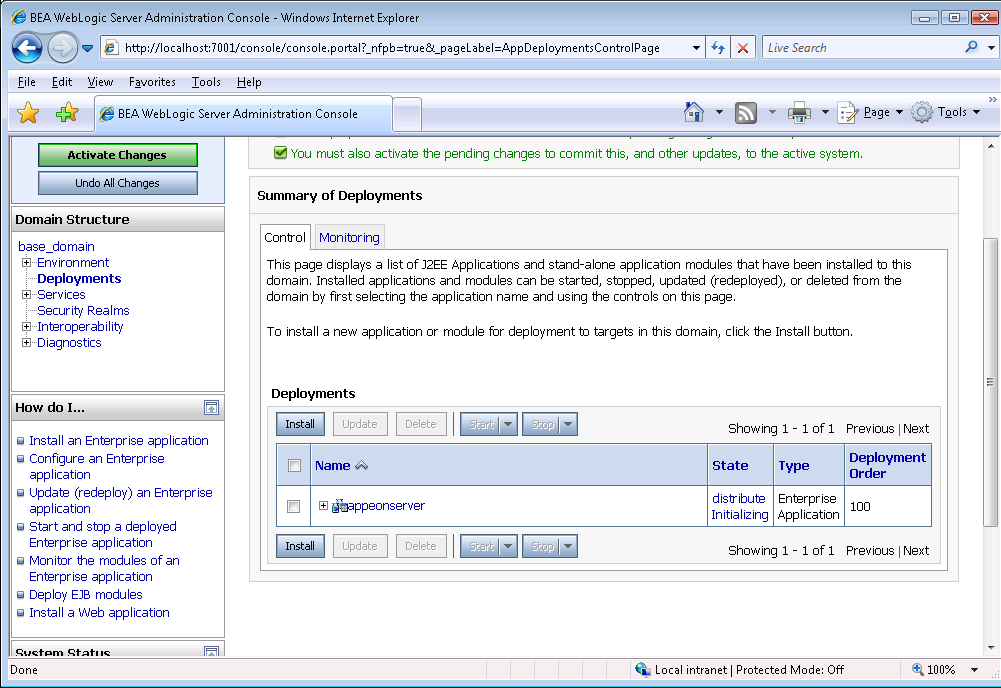
Step 8: Review and check the summary of settings you have chosen, select No, I will review the configuration later, and then click Finish, the Deployment page appears with the installed appeonserver.ear being displayed in the Deployments table.
Step 9: Click Activate Changes in the left pane to commit your pending changes to the server.
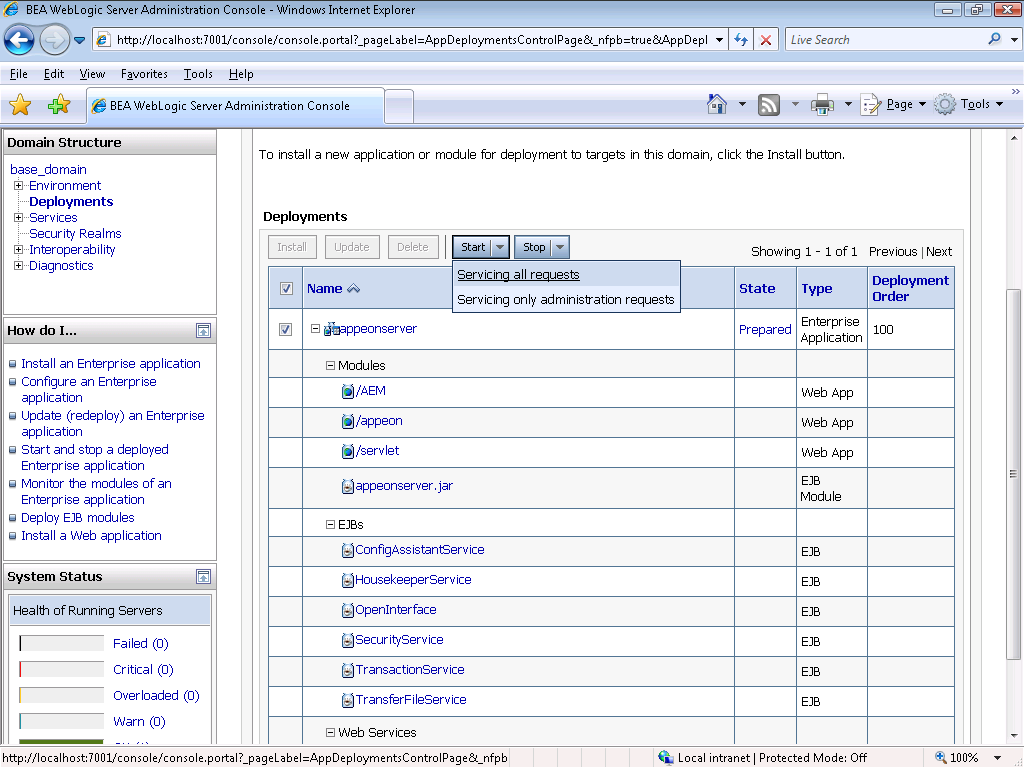
Step 10: Click the Start | Servicing all requests to deploy the appeonserver.ear file.
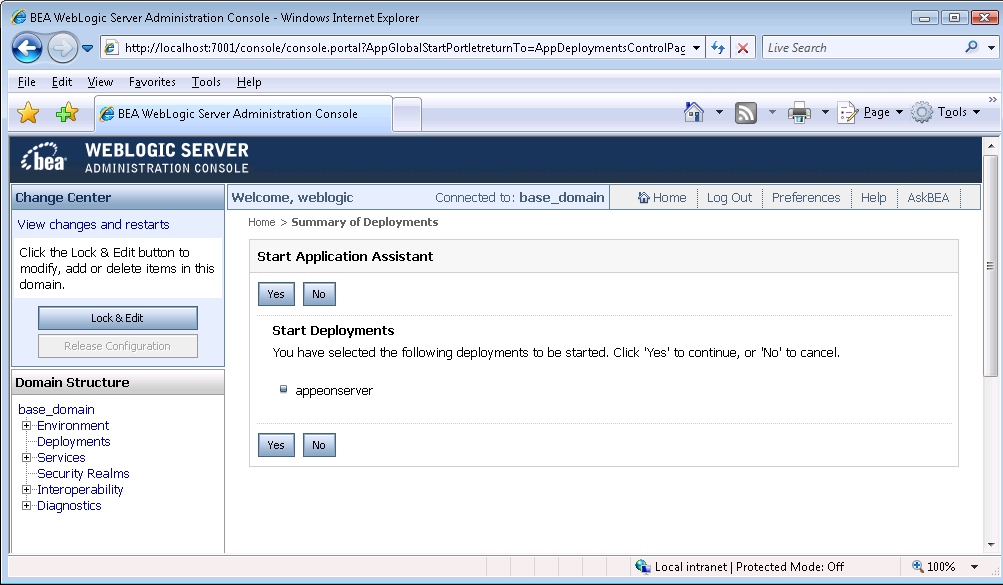
Step 11: Click Yes in the Start Application Assistant window.
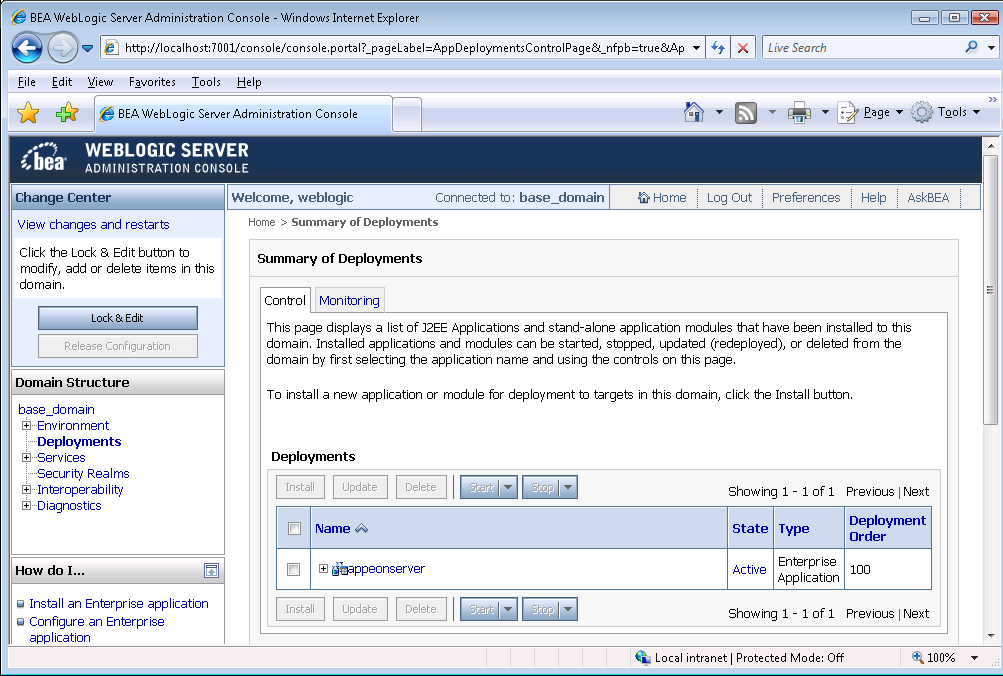
Wait until the appeonserver.ear is successfully deployed, and the State column shows Active.
Step 12: Access AEM via http://localhost:7001/AEM.
The successfully opened AEM login window confirms that the deployment was successful.
