In this section we will demonstrate how to deploy NVO to EAServer 6.1 in PowerBuilder 11. The example NVO used in this section is a simple NVO.
Configuring to Generate Stub and Skeleton
In Windows, run the following command at a prompt window to make sure Stub and Skeleton will be generated during the NVO deployment:
%EAServer%\bin\configure corba-java-stubs-on
Adding EAServer profile in PowerBuilder
Use the PowerBuilder component wizard for deploying an NVO to EAServer. Before using the wizard, create an EAServer profile in PowerBuilder, which will connect to the EAServer that hosts Appeon Server.
An EAServer profile stores information on connection settings used to connect to EAServer. The profile you create is used by wizards that require a connection to EAServer.
To add an EAServer profile to PowerBuilder:
Step 1: Start EAServer, if it is not already running. Make sure that EAServer is running during the following steps.
Step 2: Click the Application Server Profile button in PowerBar1 or choose Tools | Application Server Profile from the PowerBuilder menu.
Click Add on the Application Server Profile dialog box that is displayed.
Step 3: The Edit Application Server Profile dialog box pops up. Type the information contained in the following table into each field. And then verify the EAServer profile by clicking the Test button. Note: EAServer must be running for the test to be successful.
|
In this field... |
You should... |
|
Profile Name |
Type EAServer for tutorial |
|
Server Type |
Choose EAServer |
|
Server Name |
Type localhost |
|
Port Number |
Type 9989 |
|
Login Name |
The default login name is jagadmin. If you have changed the default, enter the correct login name. |
|
Password |
There is no password by default. If you have changed the default, enter the correct password. |
Step 4: Make sure that connection testing is successful.
Use the EAServer Component Wizard to deploy EAServer components from PowerBuilder.
To deploy the NVO into EAServer:
Step 1: Start EAServer, if it is not already started.
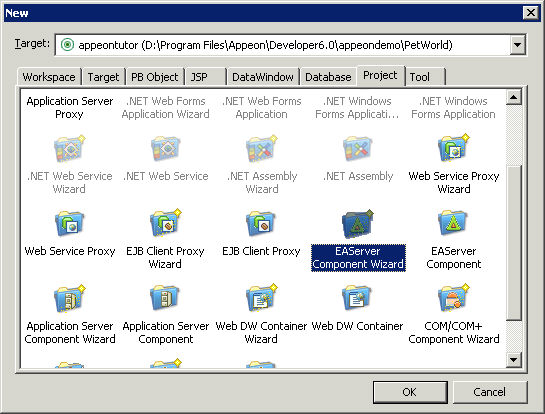
Step 2: Choose File | New from the PowerBuilder menu. Then select the EAServer Component Wizard icon under the Project tab in the New dialog box, and click OK.
Step 3: The EAServer Component Project Wizard starts. Click Next.

Step 4: Leave the project name as p_appeontutor_eascomps and Click Next.
Step 5: Select the nvo_tutor NVO that is to be deployed to EAServer. Click Next.
Step 6: Select the EAServer for tutorial profile. You created this profile in a previous step. If you have set up profiles outside of the tutorial for other EAServers, there will be more profiles in the list.
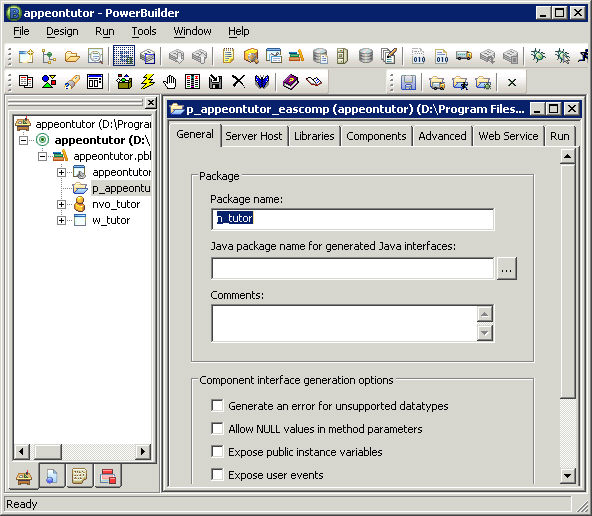
Step 7: Type n_tutor into the Package Name dropdown listbox. If necessary type the Java package name according to your own needs. Click Next.
Step 8: Select Standard Component on the Specify Component Type dialog box. Click Next.
Step 9: Specify the role name if necessary. Click Next.
Step 10: Leave the Supported option checked for the Instance Pooling Options field. Click Next.
Step 11: In the Transaction Support Options field leave the default option as Not Supported. Click Next.
Step 12: Leave all options at default. Click Next until the wizard now comes to its final stage. Click Generate To-Do List and Finish.
Step 13: The wizard now creates a component project. The Project Painter for the component opens automatically in PowerBuilder, and the project name (p_appeontutor_eascomps) appears in the left system tree list.
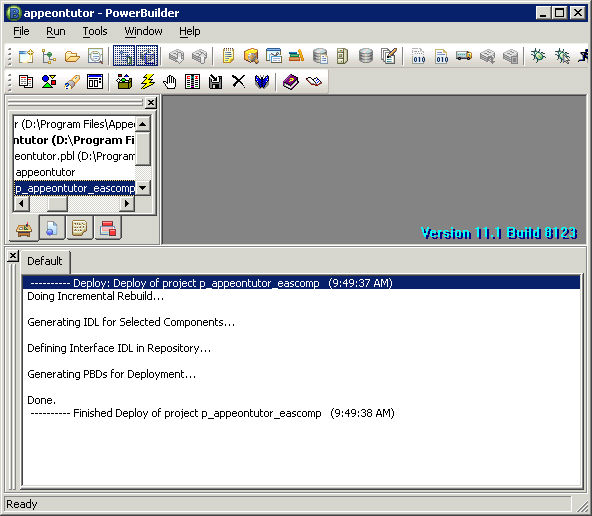
Click the Deploy button in PowerBuilder PainterBar1, or choose Design | Deploy Project from the PowerBuilder menu to start deployment of the component.
Note: Ensure that EAServer is running.
Step 14: The deployment starts and relevant information is displayed in the Output window. When the process is complete, the Output window will display "Finished Deploy of p_appeontutor_eascomps".
Step 15: Close the p_appeontutor_eascomps Project Painter.
Step 16: Check if the Stub is generated in the folder ${EAServer}\genfiles\java\classes. If the stub is not generated manually compile the Stub by executing the following command at a prompt window:
${EAServer}\bin\stub-compiler package_name.component_name.
In the deployment mentioned in this section the package name is n_tutor, the component name is nvo_tutor.